Tuesday, February 23, 2010

Random Tip Tuesday - Markers

Today's quickie tip -- the best way to store your markers.

Store your markers lying flat.  If you store them tip end up, all the ink runs away from the tip so the tip drys out faster.

Ahhh, then the solution it would seem is to put them tip down, but the problem here is the ink all pools in the tip.  So, you end up with a lot of ink at first (darker and wetter images).  Then, the color fades so you won't be getting a nice even color throughout the life of the marker.

Flat storage is best as it always maintains about the same level of ink in the tip throughout the life of the marker.

Towards the end of its useful life if it's not refillable then you may want to place it tip down to get every last drop out of it.  You could also try refreshing one last time by dipping in a small trace of water...sometimes it works, sometimes not -- depends on the brand.

Happy paper crafting

Saturday, February 13, 2010

Celebrate: SSS-43 Challenge

Here is my card for this week's Sweet Stop Sketch Challenge.


Supplies
CTMH Stamp of the Month March 2010: A Little of Everything (D1408)
CTMH You're a Hoot Stamp Set (C1362)
CTMH Exclusive Inks Moonstruck Stamp Pad (Z2134)
CTMH Exclusive Inks Cocoa Stamp Pad (Z2114)
CTMH Start Dust Paper Packet
CTMH Antique Brass Bitty Brads
Piercing tool
Edge Distressor
Cricut Cartridge Accent Essentials for the 1/2 circle (page 32) & Accent 6 (pg 37)
Wiggle eyes

Directions
1. Card base is 5.25" x 4.5" (side fold)
2. Cricut circle cut at 5" and the accent cut at 5.25" from B&T Duo paper and CS included with the Star Dust Paper Packet.  Individually pierce each tab on the accent piece; glue 1/2 circle piece to 1/2 accent piece.  Attach to top portion of card.
3. Stamp Owl & branch with Cocoa on 2" x 2" CS and sponge edges with Cocoa, then layer on the 2.25" x 2.25" B&T duo paper and attach to lower portion of 1/2 circle set
4. Attach a 5.5" x .5" piece B&T duo strip to lower portion of card
5. Stamp Celebrate in Moonstruck on a 4" x 1.25" piece of CS (trim if needed), pierce holes in the 4 corners and put the Antique Brass bitty brads through.  Attach to low left portion of card.
6. Add sentiment inside if desired.

Don't forget to check out my blog candy in celebration of my Blog anniversary!

Dreaming of Purple: Belli Challenge #84, Ribbons

If you have a passion for purple like I do, this card has plenty of purple. :)  After you check out the supplies and directions you might want to check out my very first Blog Candy too.


Supplies
Close to My Heart Colonial White CS (1388)
Close to My Heart Desert Sand CS (1273)
Close to My Heart Amethyst CS (X5631)
Close to My Heart White Daisy CS (1385)
Close to My Heart Exclusive Inks Hydrangea Exclusive Stamp Pad (Z2129)
Close to My Heart Exclusive Inks Hydrangea Marker (Z2329)
Close to My Heart Stamp Set Aspiration (C1340)
Martha Stewart Topiary border punch
Pearl Embellishment
Scrap of checked purple paper
12" purple satin ribbon
Optional, Dried flowers in purple and white

 
Stamp set: CTMH
Directions
1. Cut 8.5" x 11" Colonial White CS in half to create a 5.5" x 4.25" card base when folded.  Sponge all edges of card base with Hydrangea

2. Cut a 2.5" x 5.5" piece of Amethyst and border with Topiary along both long edges; sponge edges with Hydrangea.  Attach a 1" x 5.5" piece of checkered or other matching designer paper to center.  Attach 6" piece of ribbon to center of set, then tie a bow in remaining ribbon, trim as needed, and attach to set.  Attach complete set to right side of card.

3. Stamp branch image on a 2.5" x 2.5" piece of Desert Sand CS. Then, sponge a 2.75" x 2.75 White Daisy CS on all 4 sides. Attach Desert Sand CS to center of sponged White Daisy CS.  Attach towards left of card in upper section.  Attach dried flowers if so inclined, if not skip to the last step.

4. Using the Hydrangea, stamp flower base using second generation stamping, then stamp flower outline on top; cut out on lines and add pearl to center of flower.  Stamp smaller flower and trim close. Attach both flowers to lower portion of Desert Sand CS (covering dried flower stems, if used).

5. Stamp Eleanor Roosevelt saying inside and Dream saying outside.


• Visit the Belli Challenge Here or by clicking on the button over on the left.


♥ ...and don't forget to go here to sign up for some blog candy!

Thursday, February 11, 2010

Two 1-year Celebrations - 1 big Blog Candy Give-away!

Two Celebrations are on my horizon: Blog Anniversary and CTMH Anniversary!

February 21, 2010 marks the one year anniversary of my blog.  When I first started, I was still using my eBay name and wasn't sure which direction I was going with my blog.  A short time later I joined Close to My Heart and my direction was set!  Which brings me to my next celebration -- my one year anniversary with Close to My Heart on March 27, 2010.

So, ....happy birthday to my blog.  It turns 1 in a couple weeks and happy birthday to being a Close to My Heart Consultant for 1 year at the end of next month.  Come help me celebrate these two (one-year) milestones with my FIRST ever Blog Candy worth $75.00 plus.


The Blog Candy includes 2 "D" stamp sets from Close to My Heart (since it's a party these two stamps are perfect: It's Your Day and Notice the Details), 1 brass embossing stencil (make a wish), 1 Fiskars multi-stencil including curve for lettering, and finally one set of K&C Company 12X12 Scrapbook Page Protectors (set of 10 -- holds 20 pages).  All of this comes to over $75.00 and it is all yours just for helping me celebrate my 2 anniversaries.

As a special treat I will add more to the list every 10th person; the more people the more treats.

Here's what you need to do to be entered to win the above Blog Candy:

1. I would love for you to become a follower, if you aren't already.
2. I would appreciate it if you could post about my candy on your blog and/or put it in your sidebar with the following link back to me: http://stampmyart.blogspot.com/ (you can grab my button over on the left too if you like)
3. Most important: post a quick comment below and include how to reach you if you don't have a blog,(or even tell me how you found me).
I will be using Random.org to select the winner on March 20th and the Blog Candy will be sent out shortly after receiving mailing information from the winner.

Remember the more people the more "candy" I will add to the collection, so tell your friends...it may not look like much now, but I'm just getting started and $75.00 is a lot to me, LOL. ;-)

Good Luck! ...and Thank you for helping me celebrate! :)

Wednesday, February 10, 2010

Snow Shovel Trick

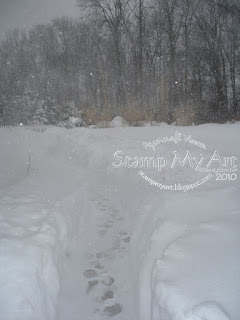
Well, if you're over here on the north east you're getting walloped with loads of snow! Hot on the heels of one storm that many of us were still digging out and along comes another with yet another chasing up from behind. This snow is a bit heavier than the last, so be careful with that shoveling.


Speaking of shoveling...anyone tired of that snow sticking to their shovel?  I know I sure feel the weight when only 1/2 of what I shovel actually leaves the scoop, LOL.


A great way to get that snow to s-l-l-l-l-i-i-i-d-e off.....put a little bit of cooking spray on the scoop and your shoveling will be so much easier as it slips right off the shovel.

Go ahead --- give it a try!

Now off to some paper crafting...woot!

Sunday, February 7, 2010

Mojo Monday 124 - Piece of Cake


Mojo Monday got me thinking this week...I used the CTMH February Stamp of the Month -- Piece of Cake (D1407) Stamp Set.


Supplies
Cuttle Bug -- deco squares embossing folder (not sure of the name will have to look for it)
CTMH SOTM Spring 2010 -- Piece of Cake Stamp Set (D1407)
Close to My Heart Day Dream paper packet
CTMH Exclusive Inks, Ink pads: Lilac Mist (Z2133), Sweet Leaf (Z2153), Créme Brulee (Z2167), Bubblegum (Z2109)
Colonial White crocheted Ribbon
Waterbrush (1771)
Marvy Uchida Medallion Circle Punch
Fiskars Floral border punch
Dried Flowers
Glue Dots, double-sided mounting foam

Directions
Create a (5.5" x 4.25") card base with the Daisy White in the Day Dream paper packet, sponge edges with Sweet Leaf.

Cut a piece of Sweet Leaf CS to 5.25" x 4"; run through your Cuttle Bug and attach to card base.

Stamp cake image on scrap of Daisy White CS; let dry before coloring with the waterbrush.

Attach B&T Duo paper (approx 1.5" x 2.75") to a 1.75" x 3" piece of Lilac Mist; cut another piece of B&T (2" x 2"); attach to card.

Using scraps of Blush and Daisy White, punch out medallion shapes (one each colour); sponge the white with Lilac Mist and stamp "Happy Birthday" with Lilac Mist; attach the sentiment slightly off-set on top of the blush.

Edge punch 1.5" x 4" Lilac Mist; attach Colonial White Crocheted Ribbon, then attach to card base.

Add Dried flowers with glue dot or double sided sticky mount, add another on top of that to attach the sentiment.

Attach the Cake with dimensionals/pop-dots/double-sided foam mounting tape.

Add sentiment inside as desired.

SSS42 - with love (in the round)

I don't know for some reason I'm on a pink and blue creative roll this weekend. Today's card uses Close to My Heart's Day Dream Paper Packet for the Sweet Stop challenge, which is to make a circle card. You can visit the Sweet Stop by clicking on the icon over to the left.


This is my first successful circle card...and it makes me ooooh... so much more a Cricut fan. I could not have done this without my Cricut. I tried once upon a time to create a circle card...ewwwww... it was terrible, LOL. So, I thought for sure I would bag the idea and never again make a circle card. Well along comes Cricut's Wild Card Cartridge and I thought, well maybe someday if I feel so inspired....well, I guess I felt inspired to give it another go...because this time at least it looks like a card...hahahaha.

Supplies
Cricut cartridge Wild card (Blackout Doily card, pg 52)
Cricut cartridge Accent Essentials (Circle using Accent1s, pg 32) - cut @ 4.5" (once with Close To My Heart's DayDream B&T duo paper, and once with CTMH's Lilac CS)
Cuttle Bug embossing folders - Bubbles & the border saying: with love
Fiskars All a-fleur Embossing Border Punch
Close to My Heart Exclusive Inks Bubblegum ink pad (Z2109)
Close to My Heart Exclusive Inks Lilac Mist ink pad (Z2133)
CTMH White Ricrac
Just Blooms Paper Flowers (Z1300)
CTMH Day Dream Paper packet (all B&T and CS colours used are in the packet)
Colonial White Brads (from the basic collection - Z1218)
Hollyhock Ribbon (from the Hollyhock collection - Z1122)
pop dots
Red gems

Directions
1. Using the Cricut Wild Card Cartridge and CTMH Blush CS, cut Doily on Blackout @ 4.75" to create the card base.
2. With the Cricut Accent Essentials cut a 4.5" circle using the CTMH B&T duo paper included in the Day Dream paper packet (I used the one with the crown and the frog on it).
3. Cut another circle this time using the CTMH Lilac CS -- then cut the circle in half or slightly less than 1/2. Emboss with the bubbles on the Cuttlebug
4. Using left over scrap about 1" x 4.5" use the Fiskars embossing border punch on the CTMH Sweet Leaf CS, glue to the straight edge of the Lilac CS
5. Glue white Ricrac ribbon to cover seem between Lilac and Sweet Leaf CS, folding excess to back to hide edges.
6. Glue set to left edge of card base (mine has fold at top, but it works with the fold at the side too)
7. Emboss with love on a small piece of CTMH CS, and cut to fit. Sponge with Bubblegum ink to make "pop" out; glue in place
8. Sponge the larger paper flower with the Lilac Mist and the smaller paper flower with the Bubblegum; insert brad into each, place on card using pop-dots.
9. Tie ribbon into a bow and place on card with pop dot (or glue dot)
10. Glue 3 red gems below the "with love"
11. Add sentiment to inside

Valentine's Day: Romantic Love or All Love?

Valentine's Day is soon here and it's just bursting for card makin'!  A lot of people think that Valentine's is only about romance, but hey, let's face it there are a lot of single people out there. ...And what about our children? ...for some mothers they are first in their he♥rt and that, while not romantic, is sure worthy of remembrance.  Remember someone special in your life this Valentines day -- it's not just about the chocolates or the push of dead flowers (sorry, I rather have them in the ground, LOL) -- give them a hug or just let them know you are thinking of them this Valentines

I made this card for my daughter who is away at college. Many of you may remember the Advent Card a Day activity I did for her at Christmas time.  While this is not a multiple-day posting of Valentines cards, you'll find that I'm always sending her something at some time or another, LOL.  She also received a box of goodies (chocolates, stuffed creatures....you know the whole Valentine gamut from mom to daughter).

Today's card seems to fit many challenges ... I guess it is just the way with Valentines. :)  Two challenges here -- Check out Just Buggin' Challenge and for Crazy 4 Challenges links over there on the left.

***update posted 2/15/10 -- Forever Friends (words are the link back to the blog) just posted their challenge today and said you may use an already posted "Hearts" card.

To start, the heart and the shapes for the sentiment were made easier thanks to my Cricut! :)


Supplies and Directions
1.  From a small piece of Chipboard, cut 2.5” heart from Cricut cartridge Accent Essentials (pg 67); use sponge applicator to color entire surface with Close to My Heart Exclusive Inks Tulip (Z1266), then glue Martha Steward Red Micro Beads and set aside to dry. (Too much glue will make it curl, but not enough and the beads won’t stick.)

2.  Stamp tag (4 x’s) from Close to My Heart Stamp Set, February Word Puzzle (D1269) using CTMH Exclusive Inks Tulip (Z1266) on a scrap of Daisy White or Baby Pink CS – then choose which words you want to put on the tags (like the Valentines candy hearts) stamp each tag.  Next, punch a small hole in top, loop a piece of matching thread through the hole, and finally attach all together with a blush mini brad.  Set aside for later.

3. Time for Cricut again: Using CTMH Daisy White CS Cut Accent 48S (pg 48) from the Accent Essentials Cartridge at 2”, and then using the CTMH Baby Pink (1299) cut at 1.75”.  Sponge edges of both pieces with the CTMH Tulip, then stamp with sentiment from CTMH Stamp Set, February Word Puzzle (D1269) and the decorative embellishment stamp from Close to My Heart Stamp Set, Cherished Flourishes (D1413).  Attach the pink CS with the sentiment to the White CS. Set aside for later.

4.  Glue Day Dream Paper Packet: Lilac/Pink B&T duo paper 1.75” x 3” to Day Dream Paper Packet: Lilac 2” x 3.25”; set aside.

5.  Now, take a piece of Daisy White CS, cut to 4.5” x 12” and fold in half to create a 4.5” x 6” card base. Then, glue Day Dream Paper Packet: Pink side of B&T duo paper 4.25” x 5.75” (X7108B) to the card base.

6. Next, using Baby Pink CS 1.5” x  4.25” (1299) take the Fiskars All a-fleur Embossing Border Punch and finish one edge.  Cut a piece of CTMH Organdy with Satin Edges Colonial White Ribbon to 5.25” and adhere to the center of the baby pink piece, folding the edges around behind to hide them.  Then, cut a piece of CTMH Blush rickrack to the same size and attach to the center of the ribbon.

7.  Time to start putting the card together.  Glue the lilac combo to the upper left area of the card, then the sentiment to the right of that centered vertically.  Next, glue the baby pink ribbon combo just below the lilac piece.

8.  Attach the tags with a piece of matching thread or similar to the ribbon.  Next take a 12” piece of organdy ribbon and the same length of blush rickrack and tie them around the ribbon into a bow (leaving the rickrack dangle free.  Push the tags over towards the bow.  Use pop-dots on the back of the heart and the put in place over towards the right side of the card.

Wednesday, February 3, 2010

February: Romance, Friendship, Love and Family -- A month of love for all!

February always brings thoughts of romance, hearts and love, but love can be the friendship kind or the family kind too. Don't forget those that may not have a romantic relationship in their life; they still need to feel loved. Here's a simple quick card for February that leaves the hearts behind, but doesn't leave the heart ♥ out of the, "I'm thinking of you today" sentiment.

Supplies
• 2.5"x4.75" Close to My Heart Card Stock, Moonstruck 1293
• 5"x11" Close to My Heart Card Stock, Desert Sand 1273
• 4.5"x5" Close to My Heart Card Stock, Barn Red X5637
• 1"x4.75" Close to My Heart Card Stock, Colonial White 1388
• 5"x5" Close to My Heart Card Stock, Colonial White 1388
• Close to My Heart Exclusive Inks, Moonstruck Z2134
• VersaMark
• Dauber Duo sponge applicator
• Close to My Heart Stamp Set, Love Language D1343
• Close to My Heart Acrylic block size 3X3
• 21" Close to My Heart Grosgrain Ribbon, Cocoa Z1100
• Close to My Heart Embossing Powder, Cocoa Z1246
• Fiskars Dandy Doodles embossing edge punch
• Cuttle Bug Embossing Folder Stylized Flowers
• Pop dots

Directions
1. Fold the Desert Sand in half creating a 5"x5.5" card base; sponge all 4 sides with Moonstruck ink using the dauber duo.
2. Stamp the Bird using VersaMard on the 5"x5" piece of Colonial White CS. Emboss with the CTMH Cocoa embossing powder; cut out (this is the most time consuming piece, you may choose to leave as a square instead and just sponge the edges).
3. Using Moonstruck and dauber duo, sponge the white areas of the tail, wing and comb.
4. Emboss the Barn Red with the Cuttle Bug Stylized Flowers folder, then sponge the edges with Moonstruck. I also sponged the flowers. Attach to the card base (fold at top).
5. Edge punch the Moonstruck CS, set aside.
6. Cut the Cocoa Grosgrain ribbon into 4 pieces -- 1 piece 6" long the other 3 pieces at 5" each. Attach the 6" piece of ribbon to the 1"x4.75" Colonial White CS, hiding the ends on the back. Attach this to the waiting Moonstruck CS. Finally, attach group to left edge of Card base with the decorative edge facing toward the center of the card.
7. Next, use the remaining pieces of ribbon to tie three different knots, trim edges as desired.
8. Now, attach bird with pop-dots. If you like add a sentiment to the front, or just place inside.

LinkWithin

Related Posts with Thumbnails